Introduction
These settings will help you prepare Affinity for creating and editing your bulletin. Some settings, such as a light or dark interface, are personal preferences. Others control your document layout and how PDFs are opened or exported.
Start by opening Affinity on your computer. Work through the sections below, checking document and PDF options when you use them.
Part 1 Application settings
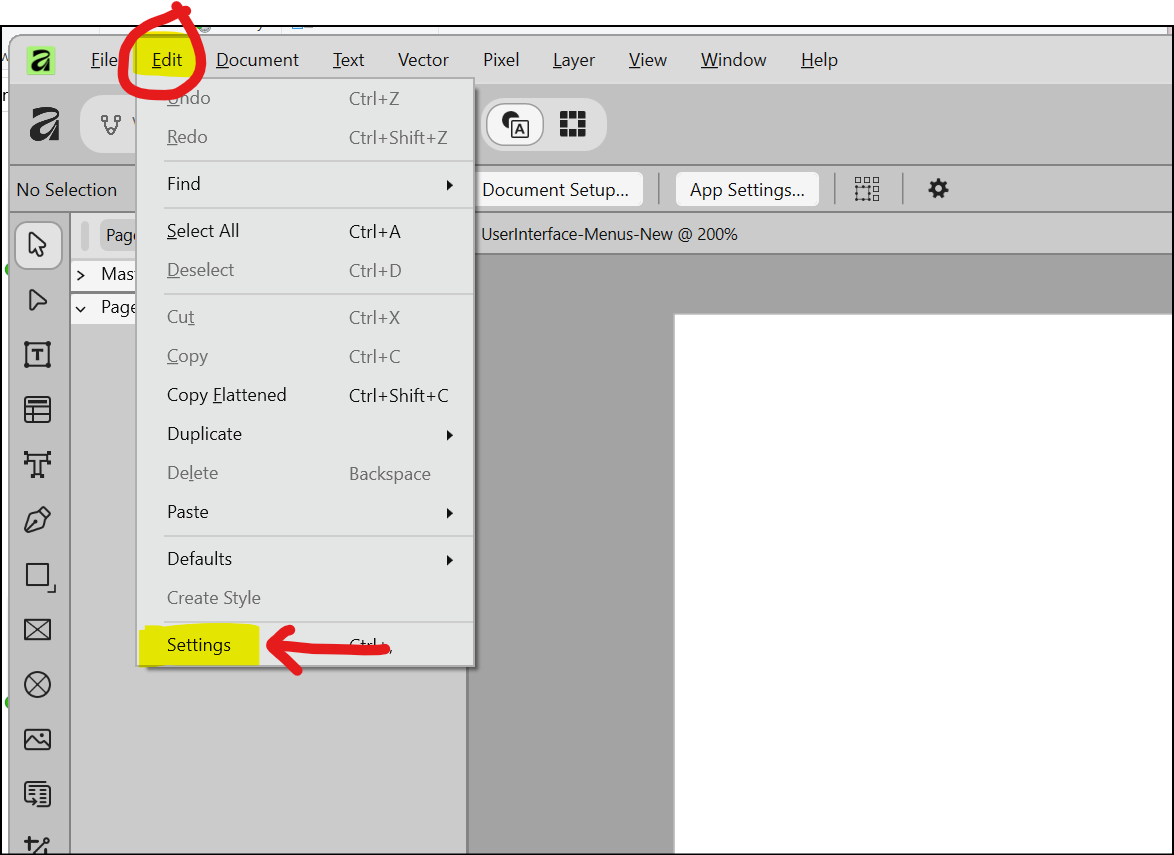
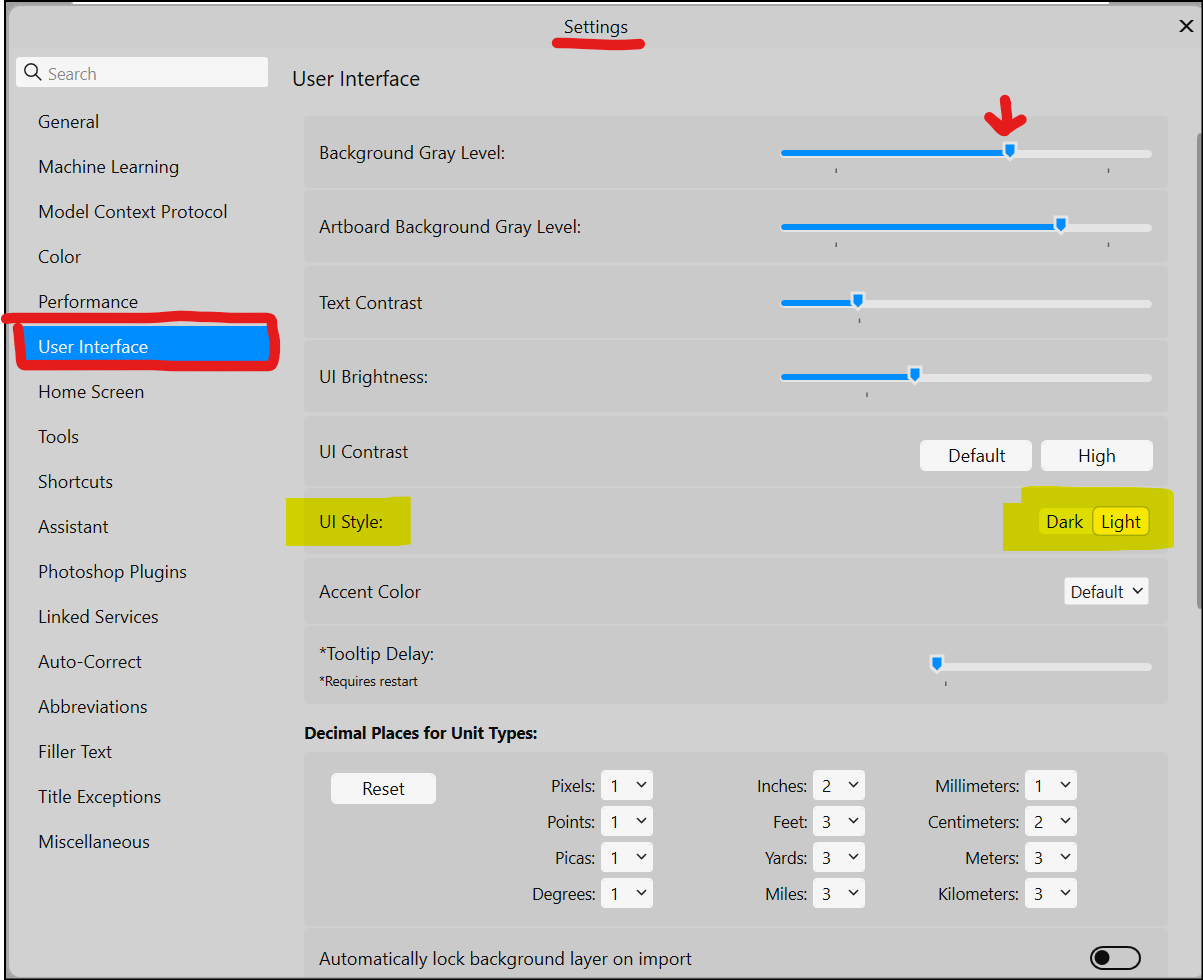
From the main menu, choose Edit > Settings.
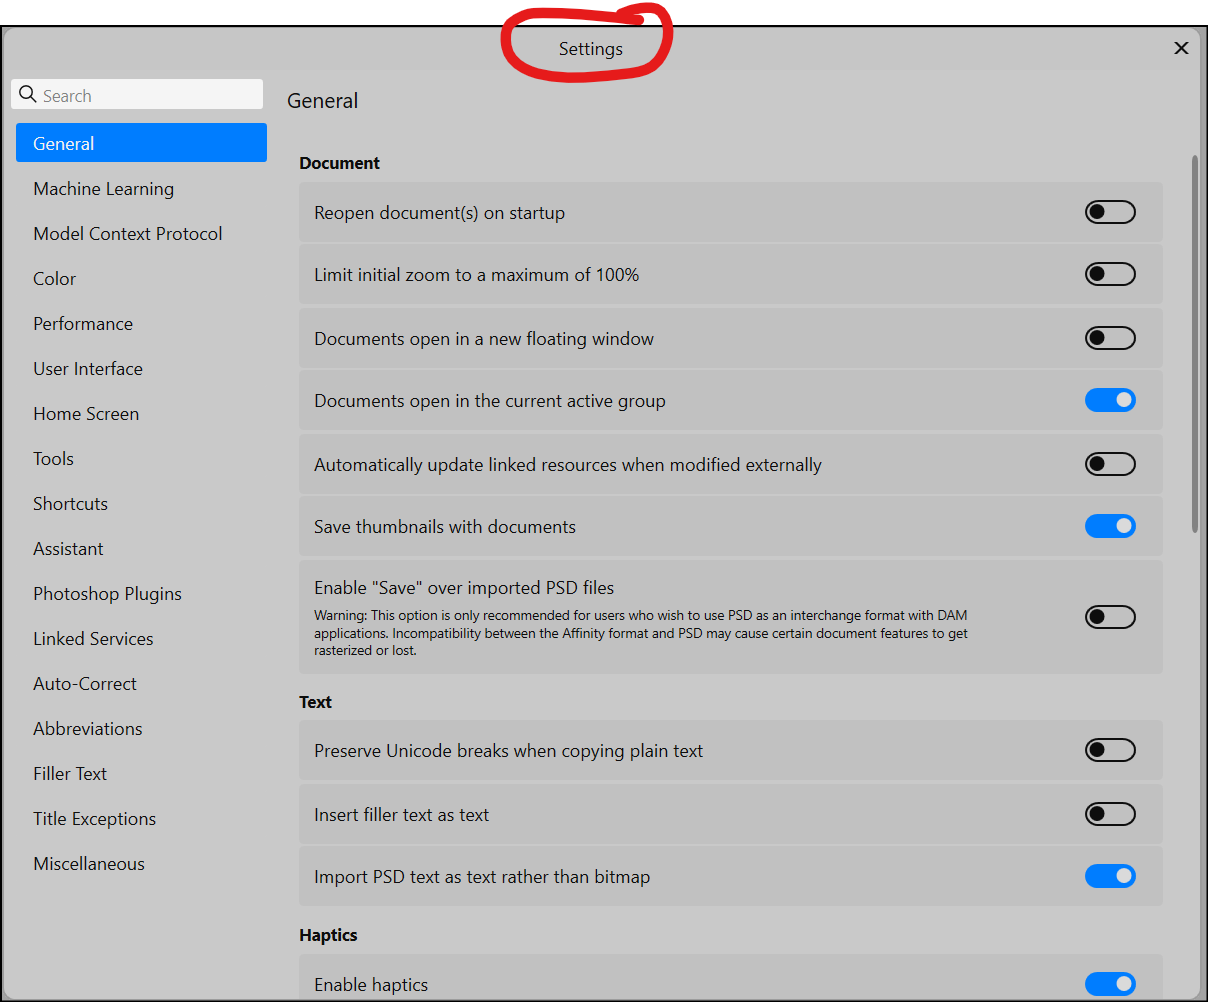
The Settings window opens.
Language
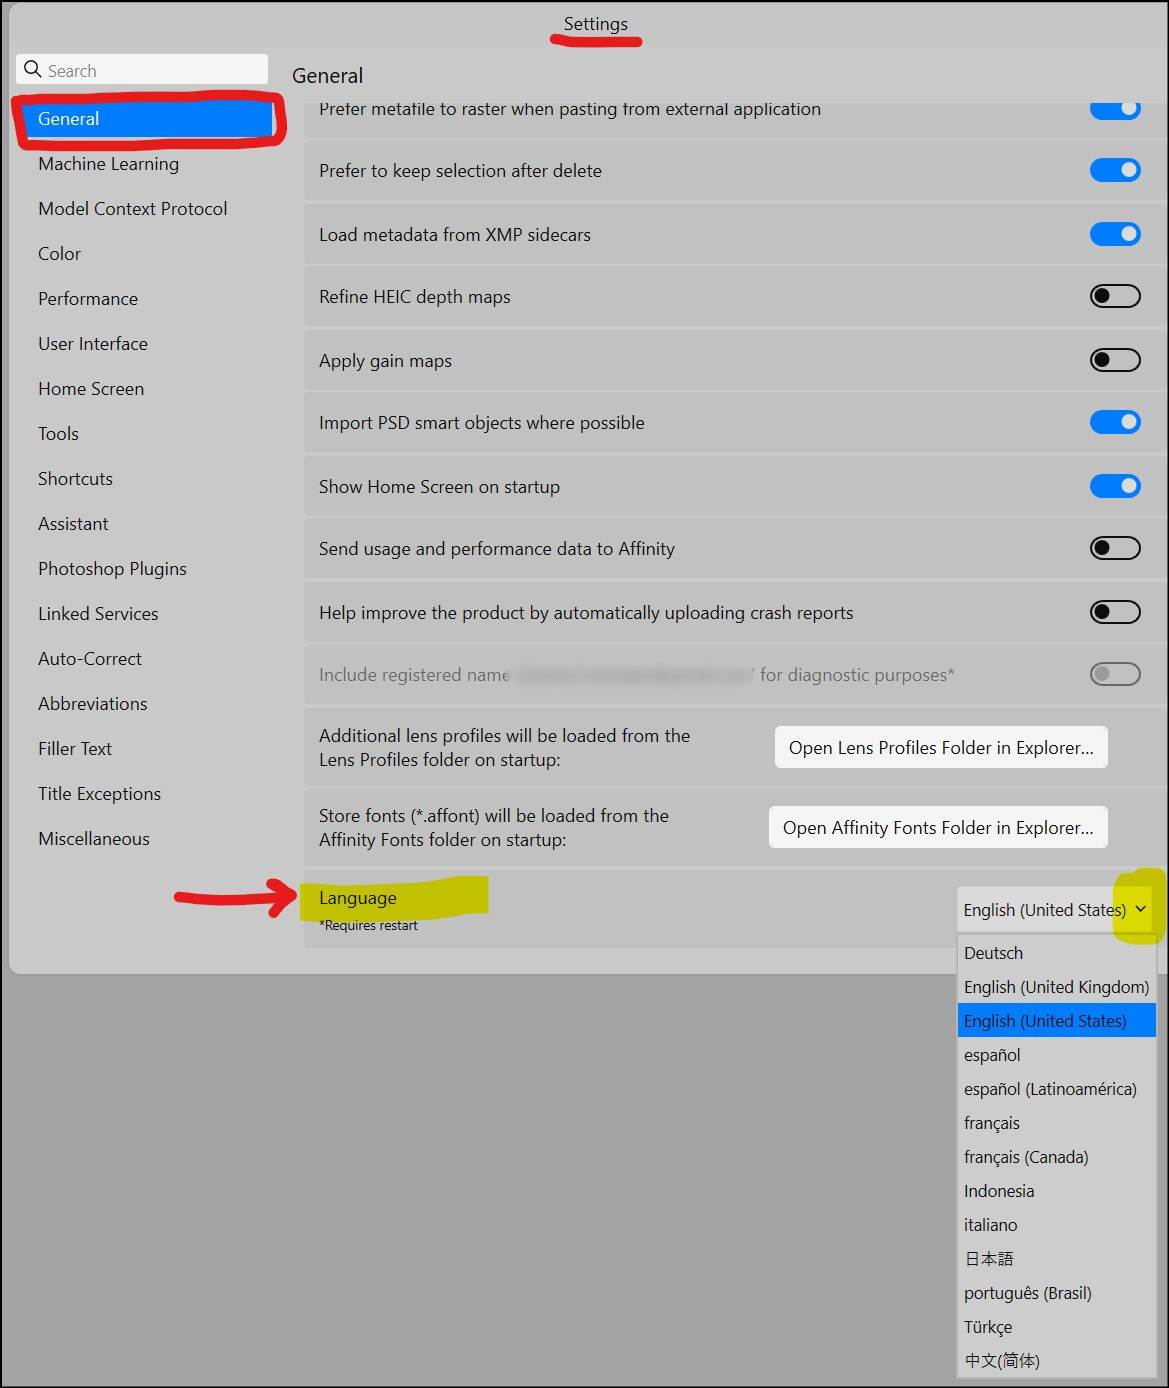
To change the language, select General and scroll to the bottom of the settings. Choose a language from the Language drop-down menu, such as Spanish or Brazilian Portuguese.
Light or dark interface
Select User Interface, then set UI Style to Light. To increase the contrast between the pasteboard and surrounding controls, move the Background Gray Level slider slightly to the left. Adjust Text Contrast and UI Brightness to suit your preference. You can ignore Artboard Background Gray Level for this bulletin setup.
Part 2 Document setup
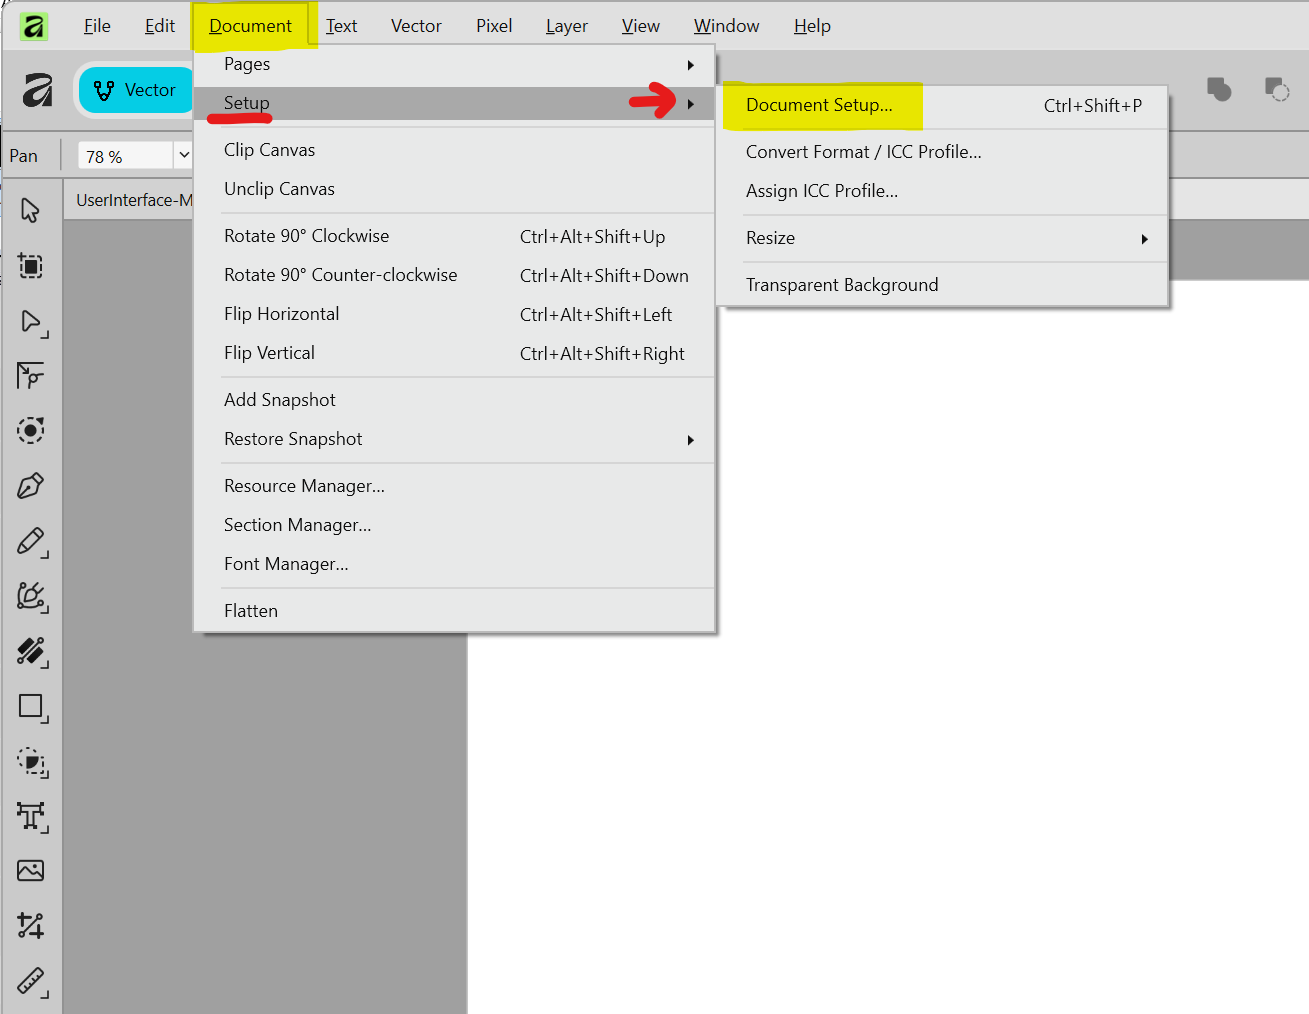
Choose Document > Setup > Document Setup.
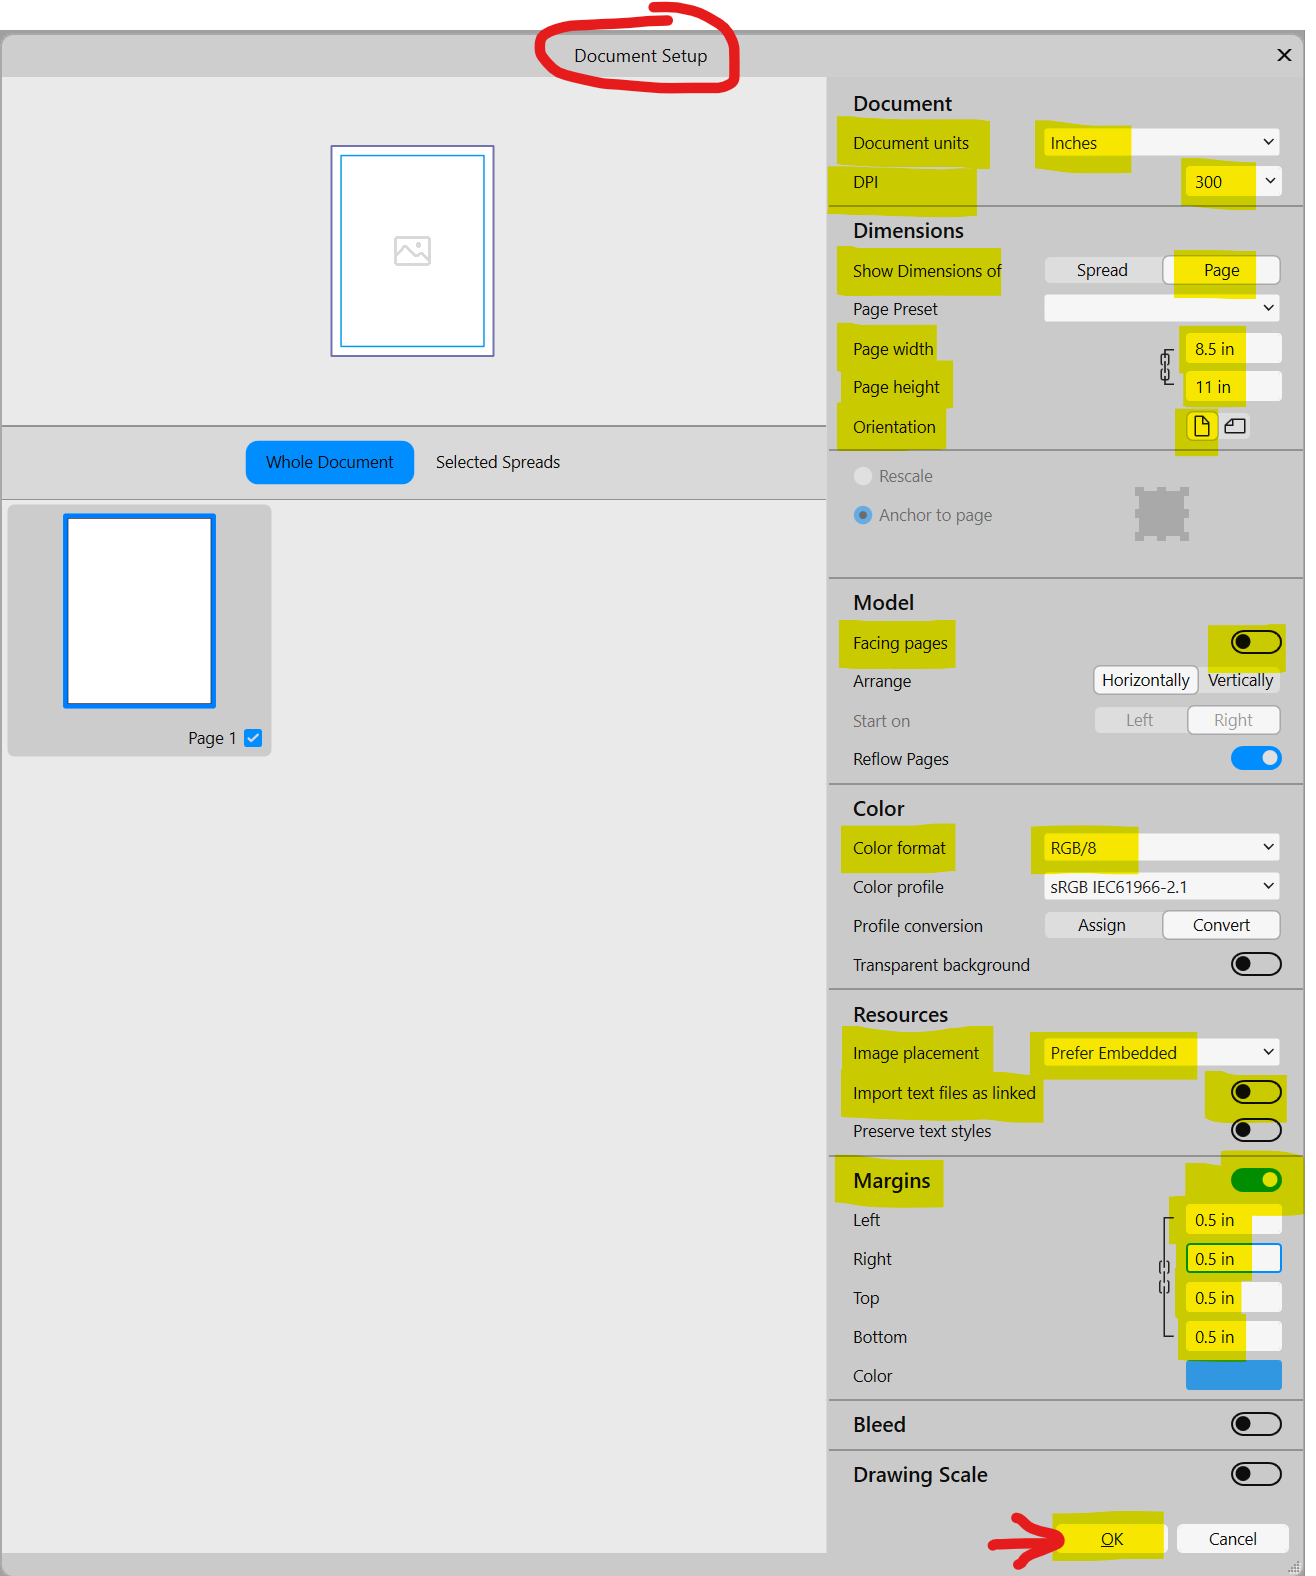
For an 8½ × 11-inch portrait bulletin, use the following settings.
Document units: Inches
DPI: 300
Show Dimensions of: Page
Page width: 8.5 in
Page height: 11 in
Orientation: Portrait
Facing pages: Off
Color format: RGB/8
Image placement: Prefer Embedded
Import text files as linked: Off
Margins: On
Set the top, bottom, left, and right margins to 0.5 in or 0.375 in (⅜ inch). Keep all margins at least 0.25 in.
Click OK to save the document settings.
Part 3 View settings
Show items on the pasteboard
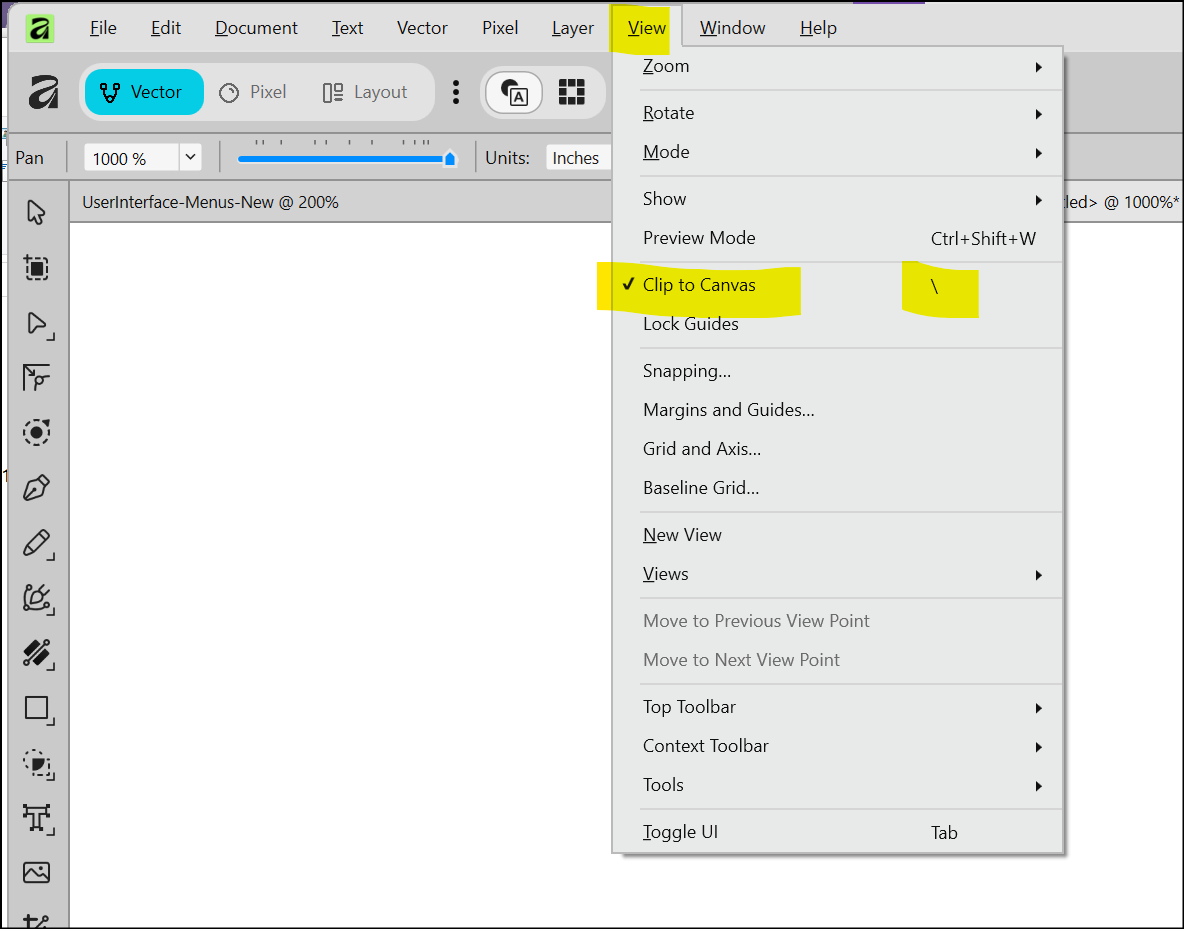
Choose View > Clip to Canvas. If the option is checked, click it to remove the checkmark and show items outside the page. This is similar to viewing the scratch area in Microsoft Publisher.
You can also press the backslash key (\) to switch this setting on or off.
Part 4 Opening a PDF
When opening a bulletin saved as a PDF from Microsoft Publisher, review the PDF import settings below.
Choose File > Open.
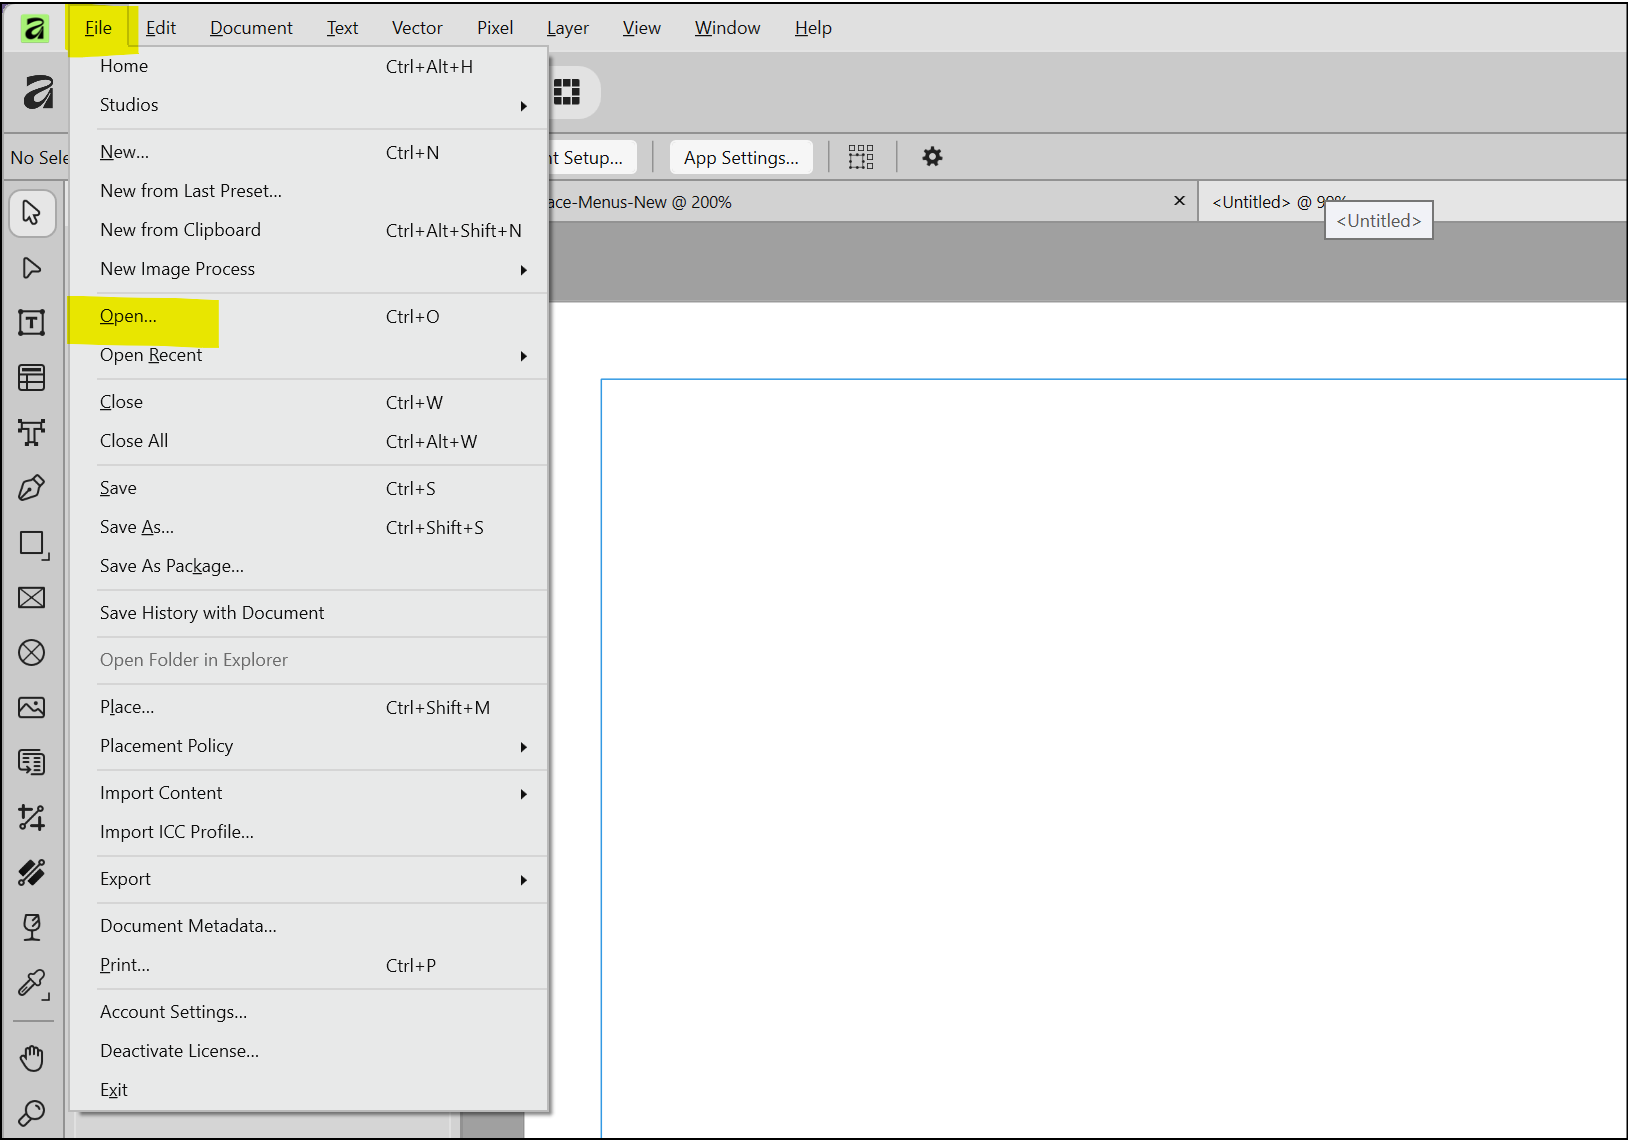
Select the PDF file you want to open, then click Open.
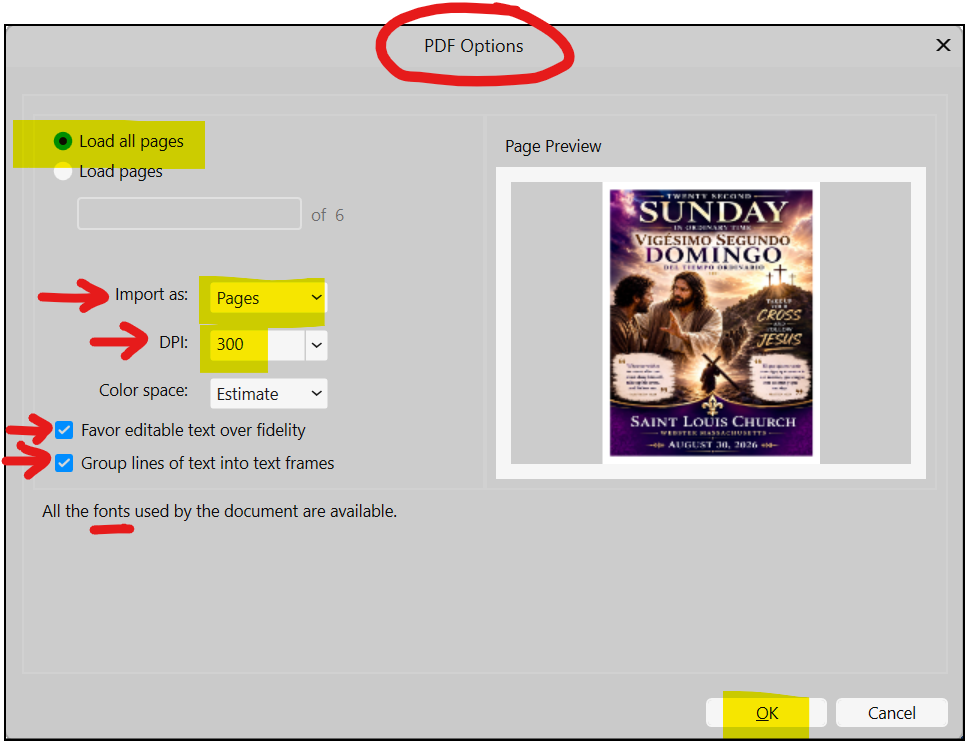
The PDF Options window opens.
Load all pages: On
Import as: Pages
DPI: 300
Favor editable text over fidelity: Checked
Group lines of text into text frames: Checked
Substitute Fonts: If fonts used in the PDF are unavailable, they appear at the bottom of the PDF Options window. Review the proposed substitutions. After opening the PDF, check the affected text for changes in appearance or layout.
Click OK to open the PDF in Affinity. Review the imported pages, then save an editable Affinity copy.
Part 5 Exporting a PDF
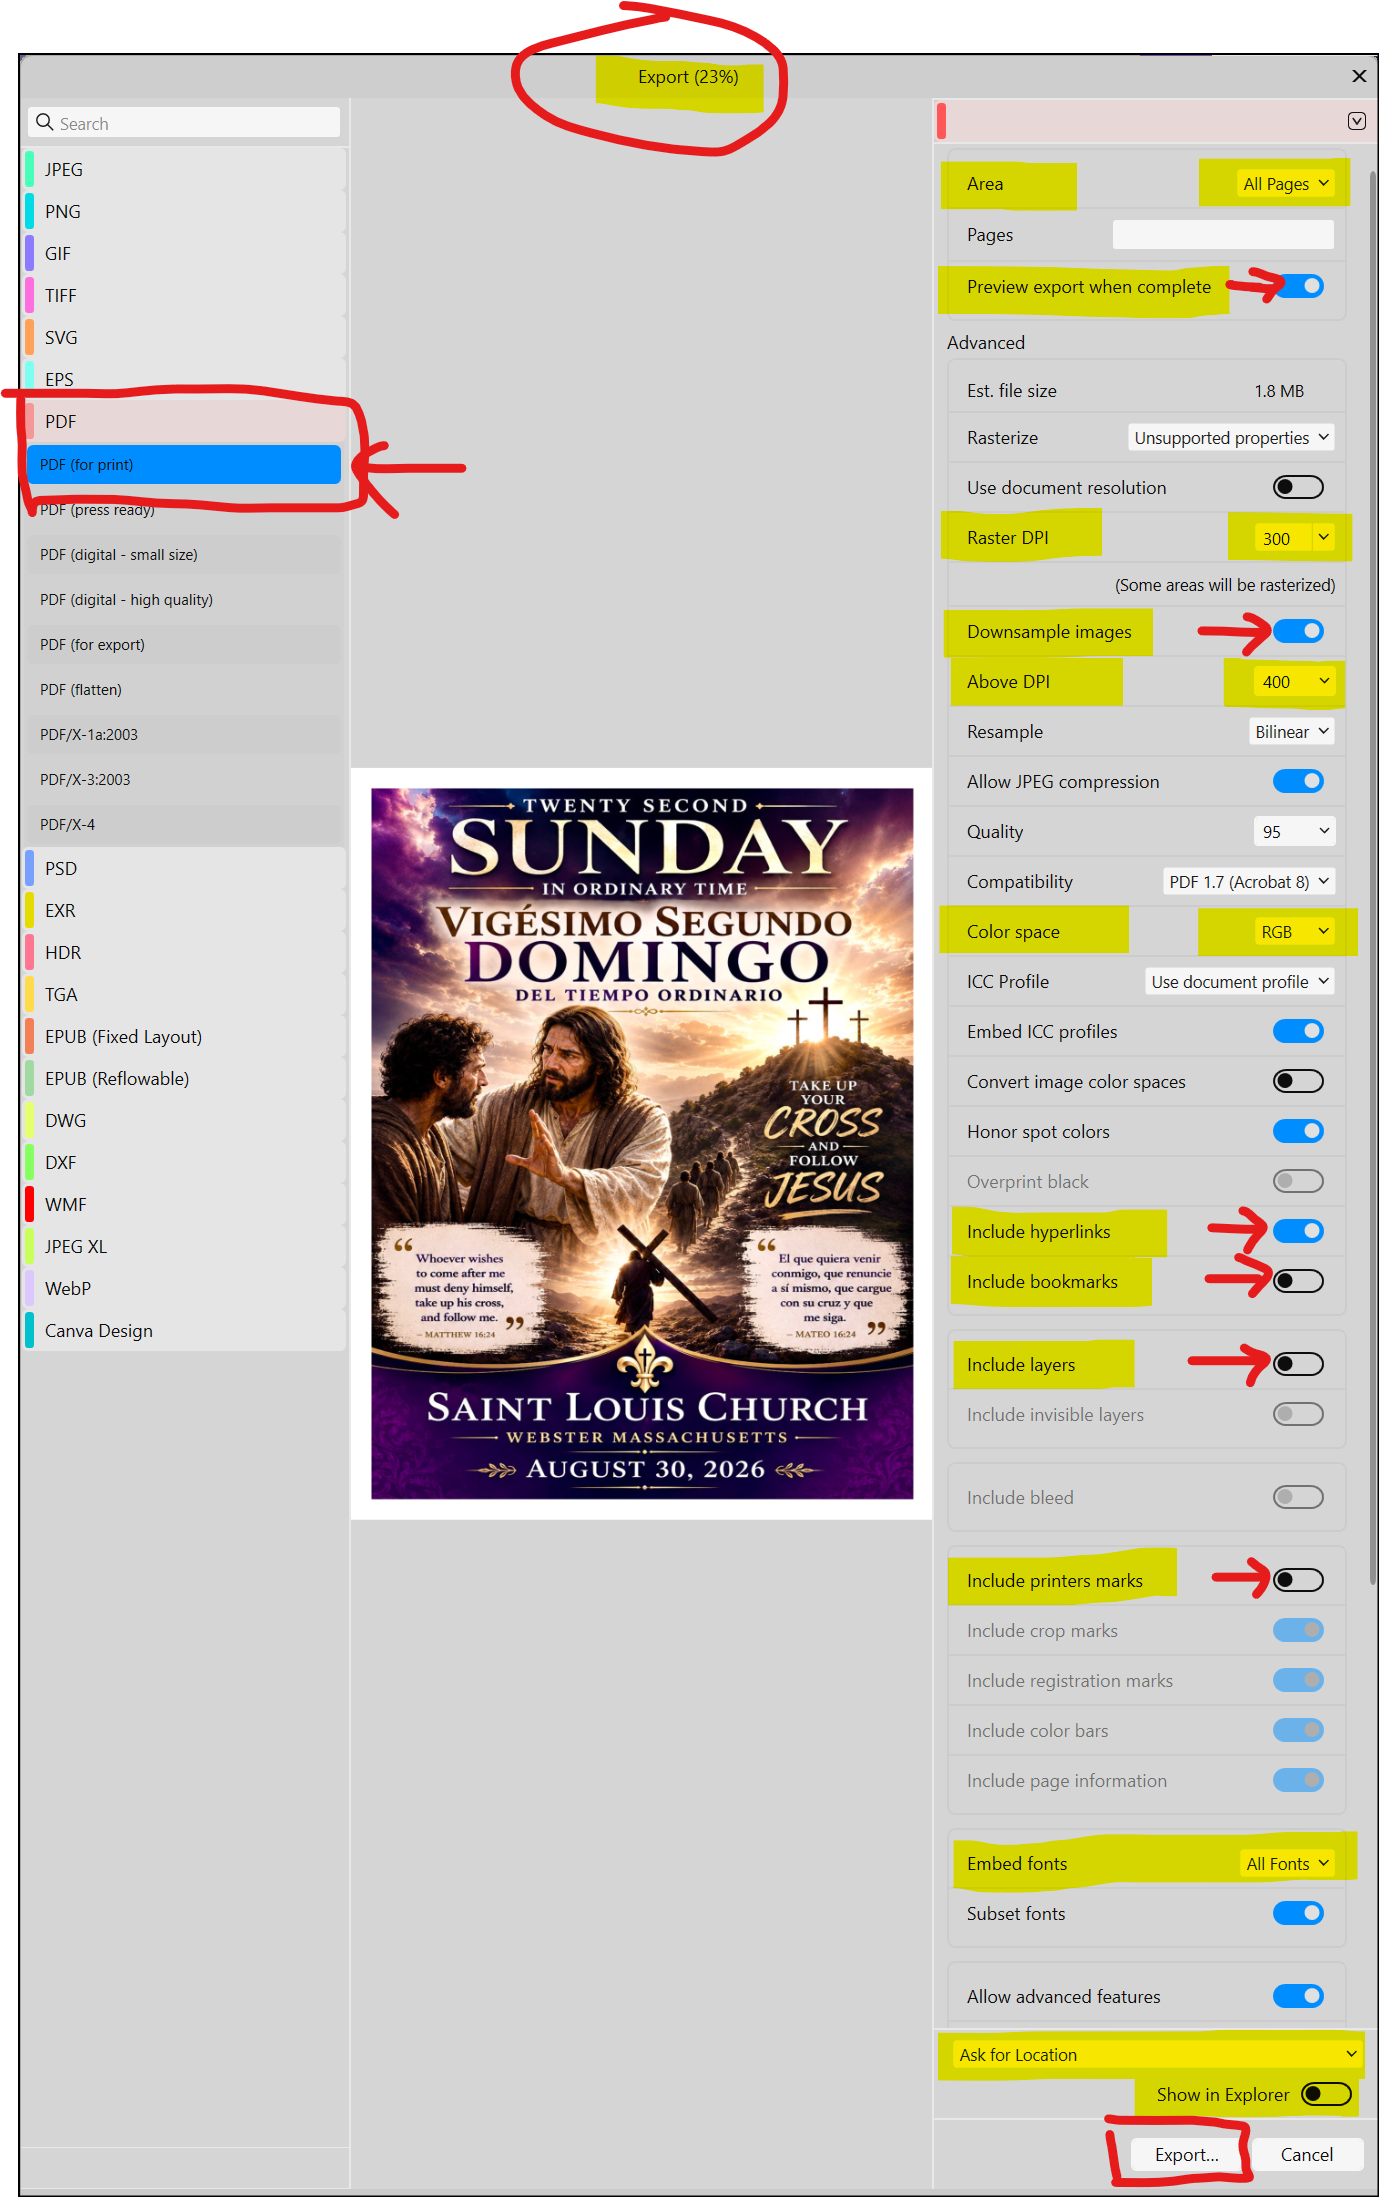
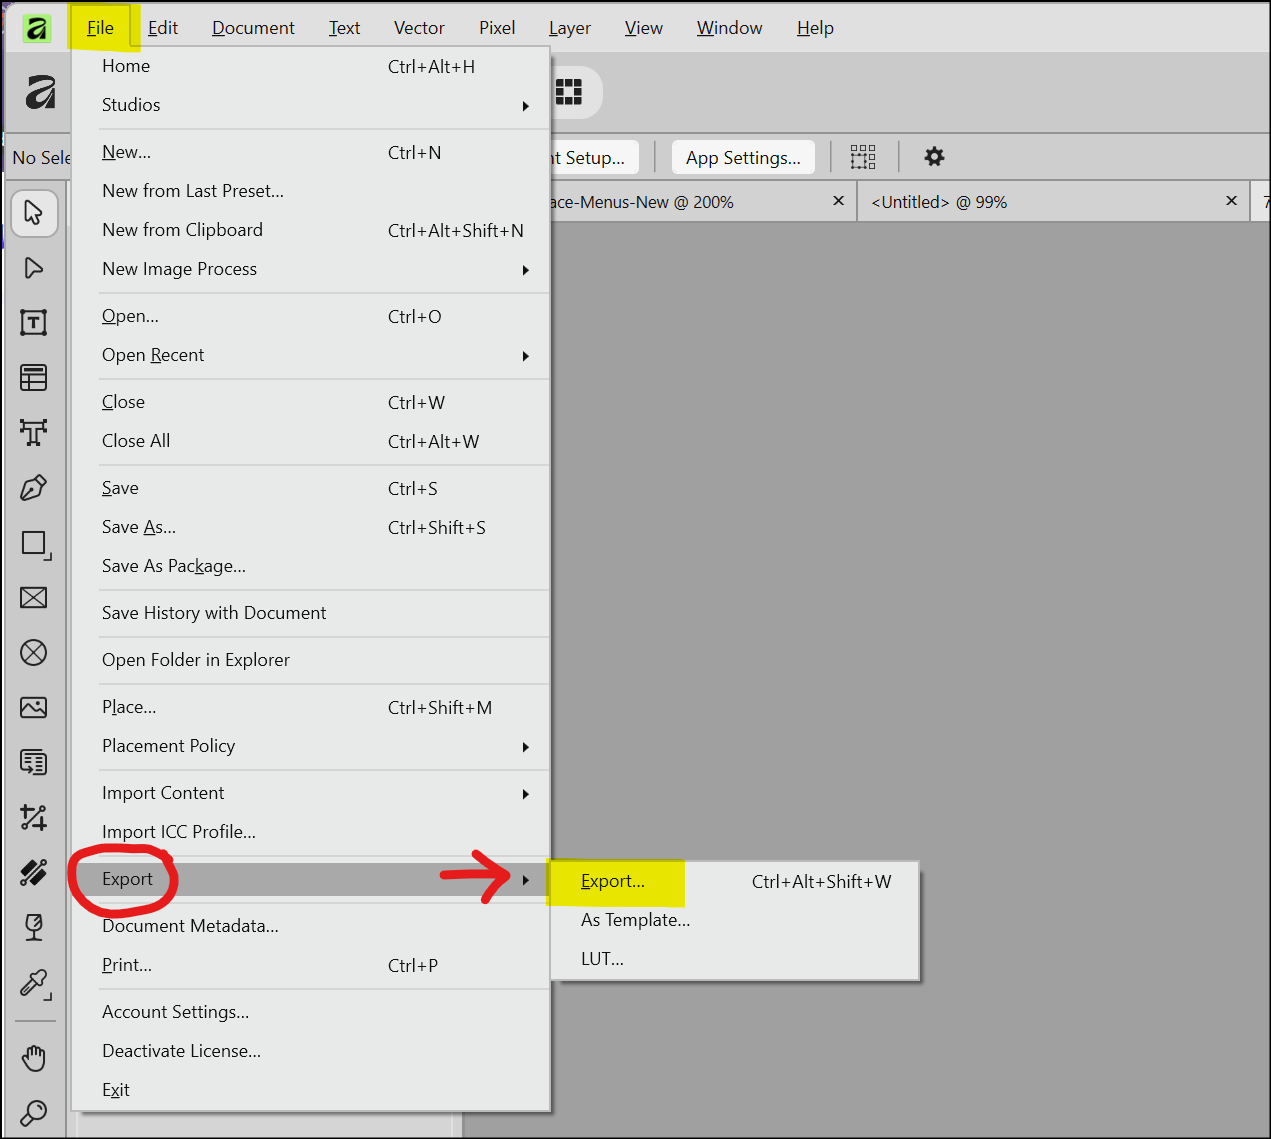
When your bulletin is ready for review or printing, choose File > Export > Export. Use the PDF settings below.
The Export window opens.
On the left, choose the PDF export option.
Export file type: PDF (for print)
Review the settings on the right.
Area: All Pages
Preview export when complete: On
Raster DPI: 300
Downsample images: On
Above DPI: 400
Color space: RGB
Include hyperlinks: On
Include bookmarks: Off
Include layers: Off
Include printers marks: Off
Embed fonts: All Fonts
Ask for Location: Turn this on to choose where to save the PDF, or save it in the same folder as your bulletin source file.
Show in Explorer: Turn this on if you want to see the exported PDF in its destination folder.
Click Export and choose a filename and location if prompted. Open the exported PDF and check every page before sending it for printing. Check the export options each time you export.